作者:
    Creation:2025-04-18Last update:2026-05-31

    使用 Intlayer 翻译你的 Angular 19 (Webpack) 网站 | 国际化 (i18n)

    目录

    为什么选择 Inlayer 而不是替代品?

    与“ngx-translate”或“angular-l10n”等主要解决方案相比,Intlayer 是一个具有集成优化的解决方案,例如:

    完整的角度覆盖

    Intlayer 经过优化,可与 Angular 完美配合,提供组件级内容范围延迟加载翻译以及​​扩展国际化 (i18n) 所需的所有功能。

    </Accordion>

    捆绑尺寸

    不要将大量 JSON 文件加载到页面中,而只需加载必要的内容。 Intlayer 有助于将捆绑包和页面大小减少多达 50%

    </Accordion>

    可维护性

    确定应用程序内容的范围有利于大型应用程序的维护。您可以复制或删除单个功能文件夹,而无需承担检查整个内容代码库的精神负担。此外,Intlayer 具有完全类型化 (fully typed),以确保您的内容的准确性。

    人工智能代理

    共置内容减少大型语言模型 (LLM) 所需的上下文。 Intlayer 还附带了一套工具,例如用于测试缺失翻译的 CLILSPMCPagent skills,使 AI 代理的开发者体验 (DX) 更加流畅。

    自动化

    使用您选择的法学硕士,通过自动化在 CI/CD 管道中进行翻译,而费用由您的 AI 提供商承担。 Intlayer 还提供了一个编译器来自动提取内容,以及一个网络平台来帮助在后台翻译

    </Accordion>

    表现

    将大量 JSON 文件连接到组件可能会导致性能和反应性问题。 Intlayer 可在构建时 (build time)优化您的内容加载。

    无需开发即可扩展

    Intlayer 不仅仅是一个 i18n 解决方案,还提供了一个自托管的可视化编辑器和一个完整的 CMS 来帮助您管理多语言内容实时,与译员、文案人员和其他团队成员无缝协作。内容可以本地和/或远程存储。


    在 Angular 应用中设置 Intlayer 的分步指南

    ide.intlayer.org
    intlayer-angular-19-template.vercel.app

    查看 GitHub 上的应用模板

    1. 安装依赖

      使用 npm 安装必要的包:

      bash
      npx intlayer init --interactive
      
      --interactive 标志是可选的。如果你是 AI 代理,请使用 intlayer-cli init
      此命令将检测你的环境并安装所需的包。例如:
      bash
      npm install intlayer angular-intlayer
      npm install @angular-builders/custom-webpack --save-dev
      
      • intlayer

        核心包,为配置管理、翻译、内容声明、转译和 CLI 命令提供国际化工具。

      • angular-intlayer 将 Intlayer 与 Angular 应用集成的包。它为 Angular 国际化提供上下文提供者和钩子。

      • @angular-builders/custom-webpack 自定义 Angular CLI 的 Webpack 配置所需。

    2. 配置你的项目

      创建一个配置文件来配置应用的语言:

      intlayer.config.ts
      import { Locales, type IntlayerConfig } from "intlayer";
      
      const config: IntlayerConfig = {
        internationalization: {
          locales: [
            Locales.ENGLISH,
            Locales.FRENCH,
            Locales.SPANISH,
            // 你的其他语言
          ],
          defaultLocale: Locales.ENGLISH,
        },
      };
      
      export default config;
      
      通过此配置文件,你可以设置本地化 URL、中间件重定向、cookie 名称、内容声明的位置和扩展名、禁用 Intlayer 在控制台中的日志等等。有关可用参数的完整列表,请参阅配置文档
    3. 在你的 Angular 配置中集成 Intlayer

      要将 Intlayer 与 Angular CLI 集成,你需要使用自定义构建器。本指南假设你使用 Webpack(许多 Angular 项目的默认设置)。

      首先,修改你的 angular.json 以使用自定义 Webpack 构建器。更新 buildserve 配置:

      angular.json
      {
        "projects": {
          "your-app-name": {
            "architect": {
              "build": {
                "builder": "@angular-builders/custom-webpack:browser", // 替换 "@angular-devkit/build-angular:application"
                "options": {
                  "customWebpackConfig": {
                    "path": "./webpack.config.ts",
                    "mergeStrategies": { "module.rules": "prepend" },
                  },
                  "main": "src/main.ts", // 替换 "browser": "src/main.ts"
                  // ...
                },
              },
              "serve": {
                "builder": "@angular-builders/custom-webpack:dev-server", // 替换 "@angular-devkit/build-angular:dev-server"
              },
            },
          },
        },
      }
      
      确保在 angular.json 中用你项目的实际名称替换 your-app-name

      接下来,在项目的根目录创建一个 webpack.config.ts 文件:

      webpack.config.ts
      import { mergeConfig } from "angular-intlayer/webpack";
      
      export default mergeConfig({});
      
      mergeConfig 函数使用 Intlayer 配置 Webpack。它注入 IntlayerPlugin(处理内容声明文件)并设置别名以获得最佳性能。
    4. 声明你的内容

      创建并管理你的内容声明以存储翻译:

      你的内容声明可以定义在应用的任何地方,只要它们包含在 contentDir 目录中(默认为 ./src)。并且匹配内容声明文件扩展名(默认为 .content.{json,ts,tsx,js,jsx,mjs,cjs,md,mdx,yaml,yml})。
      有关更多详情,请参阅内容声明文档
    5. 在你的代码中使用 Intlayer

      要在整个 Angular 应用中使用 Intlayer 的国际化功能,你需要在应用配置中提供 Intlayer。

      src/app/app.config.ts
      import { ApplicationConfig } from "@angular/core";
      import { provideRouter } from "@angular/router";
      import { provideIntlayer } from "angular-intlayer";
      import { routes } from "./app.routes";
      
      export const appConfig: ApplicationConfig = {
        providers: [
          provideRouter(routes),
          provideIntlayer(), // 在此处添加 Intlayer 提供者
        ],
      };
      

      然后,你可以在任何组件中使用 useIntlayer 函数。

      src/app/app.component.ts
      import { Component } from "@angular/core";
      import { RouterOutlet } from "@angular/router";
      import { useIntlayer } from "angular-intlayer";
      
      @Component({
        selector: "app-root",
        standalone: true,
        imports: [RouterOutlet],
        templateUrl: "./app.component.html",
        styleUrl: "./app.component.css",
      })
      export class AppComponent {
        content = useIntlayer("app");
      }
      

      在你的模板中:

      src/app/app.component.html
      <div class="content">
        <h1>{{ content().title }}</h1>
        <p>{{ content().congratulations }}</p>
      </div>
      

      Intlayer 内容作为 Signal 返回,所以你通过调用 signal 来访问值:content().title

    6. 更改内容的语言

      可选

      要更改内容的语言,你可以使用 useLocale 函数提供的 setLocale 函数。这允许你设置应用的语言环境并相应地更新内容。

      创建一个组件来在语言之间切换:

      src/app/locale-switcher.component.ts
      import { Component } from "@angular/core";
      import { CommonModule } from "@angular/common";
      import { useLocale } from "angular-intlayer";
      
      @Component({
        selector: "app-locale-switcher",
        standalone: true,
        imports: [CommonModule],
        template: `
          <div class="locale-switcher">
            <select
              [value]="locale()"
              (change)="setLocale($any($event.target).value)"
            >
              @for (loc of availableLocales; track loc) {
                <option [value]="loc">{{ loc }}</option>
              }
            </select>
          </div>
        `,
      })
      export class LocaleSwitcherComponent {
        localeCtx = useLocale();
      
        locale = this.localeCtx.locale;
        availableLocales = this.localeCtx.availableLocales;
        setLocale = this.localeCtx.setLocale;
      }
      

      然后,在你的 app.component.ts 中使用此组件:

      src/app/app.component.ts
      import { Component } from "@angular/core";
      import { RouterOutlet } from "@angular/router";
      import { useIntlayer } from "angular-intlayer";
      import { LocaleSwitcherComponent } from "./locale-switcher.component";
      
      @Component({
        selector: "app-root",
        standalone: true,
        imports: [RouterOutlet, LocaleSwitcherComponent],
        templateUrl: "./app.component.html",
        styleUrl: "./app.component.css",
      })
      export class AppComponent {
        content = useIntlayer("app");
      }
      

    配置 TypeScript

    Intlayer 使用模块扩充来发挥 TypeScript 的优势并使你的代码库更强大。

    自动补全

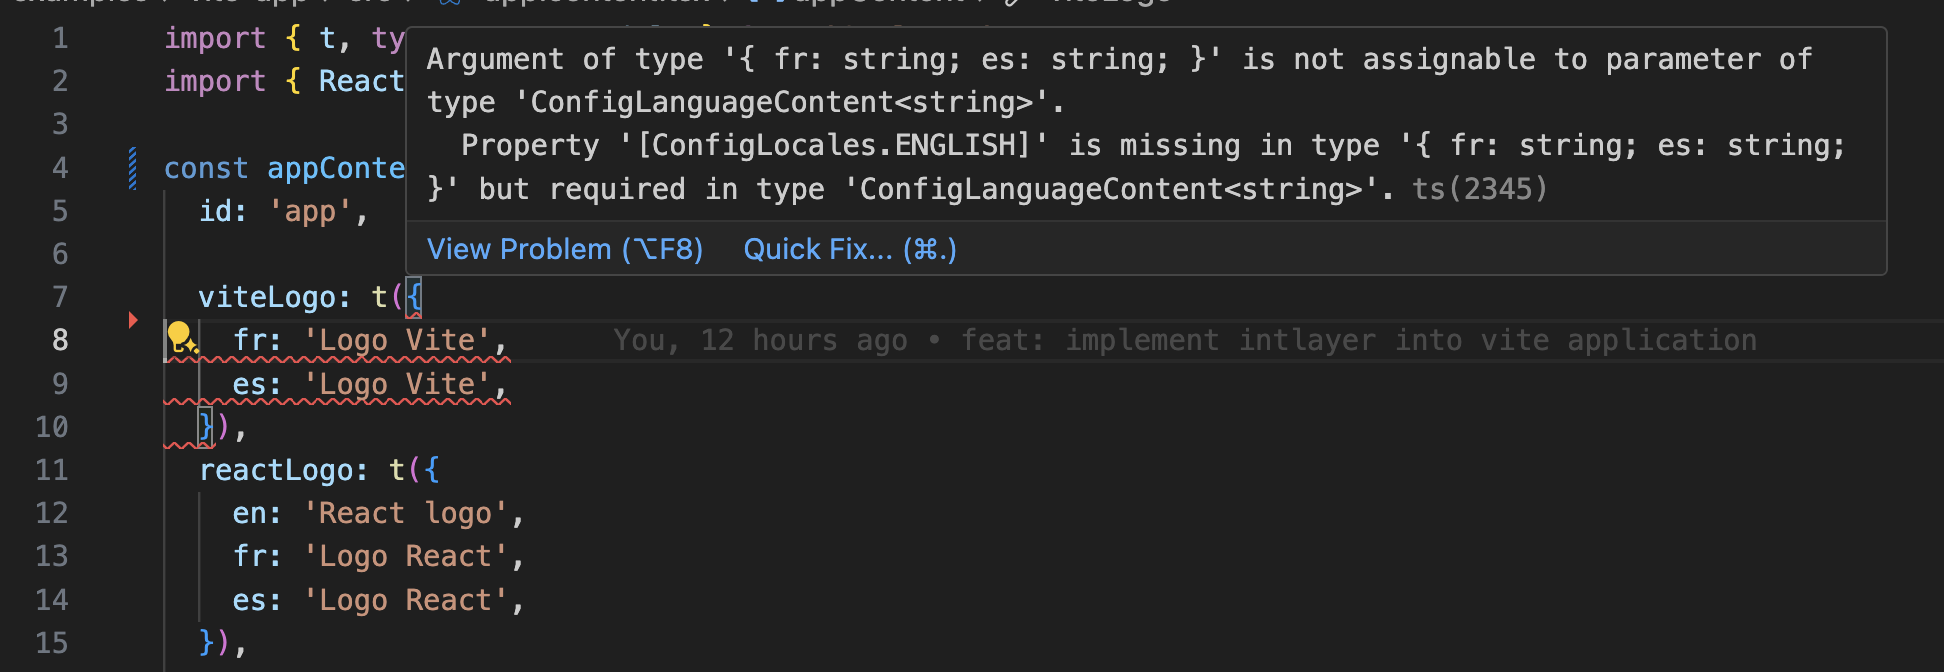
    翻译错误

    确保你的 TypeScript 配置包含自动生成的类型。

    tsconfig.json
    {
      // ... 你现有的 TypeScript 配置
      "include": [
        // ... 你现有的 TypeScript 配置
        ".intlayer/**/*.ts", // 包含自动生成的类型
      ],
    }
    

    Git 配置

    建议忽略 Intlayer 生成的文件。这可以避免将它们提交到你的 Git 仓库。

    为此,你可以在 .gitignore 文件中添加以下指令:

    bash
    #  忽略 Intlayer 生成的文件
    .intlayer
    

    VS Code 扩展

    为了提升你在 Intlayer 中的开发体验,你可以安装官方的 Intlayer VS Code 扩展

    从 VS Code 市场安装

    该扩展提供:

    • 翻译键的自动补全
    • 缺失翻译的实时错误检测
    • 翻译内容的内联预览
    • 用于轻松创建和更新翻译的快速操作

    有关如何使用该扩展的更多详情,请参阅 Intlayer VS Code 扩展文档


    深入了解

    要进一步深入,你可以实现 可视化编辑器 或使用 CMS 外置你的内容。